
New countertops sound like a huge project until someone shows you the map. The countertop installation process at Jackson Stoneworks takes just six steps, and each one is designed so you always know what happens next. No guesswork, no surprises, no wondering where your project stands.
Twenty years of installs across Gainesville and north-central Florida have shaped this system. Because every step builds on the one before it, the result is a surface that fits the first time and looks right for decades.
The Countertop Installation Process in 6 Steps
Below is the full journey, start to finish. Each step has a clear purpose, and the whole flow is built around one goal: getting the details right so you love the outcome. You can also review the same process on our site.
Step 1: Get a Free Estimate
First, we need measurements so we can put a real number in front of you. For instance, if you recently had cabinets installed, just send us those cabinet plans. Otherwise, snap photos of your whole kitchen and we’ll build the estimate from those. You can request a free quote online or call the showroom directly. Because this step costs you nothing, there’s no risk in finding out where your project lands.
Step 2: Choose Your Stone
Next comes the fun part. First, visit our showroom to see full slabs in person, or browse the online inventory from home. Bring color samples from your cabinets, flooring, or paint, and our team will help match the stone to what’s already in your space. Whether you lean toward granite, quartz, or marble, seeing the material against your own colors makes the choice far easier. Our room visualizer also lets you preview how a slab reads in a full kitchen before you commit.
Step 3: Professional Templating
After you pick a stone, we schedule a visit to measure your home with advanced templating technology. This is not a tape measure and a notepad. Instead, our equipment captures the exact dimensions of your space, including overhangs, seams, and cutouts. Subsequently, we create a CAD file for you to review and approve, so nothing gets fabricated until you sign off on the plan.
Step 4: Approve Your Digital Layout
Once the template is set, we build a digital layout of your countertops. This lets you see how your chosen slab will actually sit across your counters before any cutting begins. Veining, movement, and seam placement all show up in the layout. Because you approve this view first, the finished stone matches what you pictured in your head.
Step 5: In-House Fabrication
Now the stone gets cut. Importantly, all fabrication happens in-house, with no subcontractors touching your project. Our robotic saws cut your slab with precision, and our team then polishes the stone and finishes every edge by hand. Keeping fabrication under one roof means one crew is accountable for quality from the first cut to the final polish.
Step 6: Installation Day
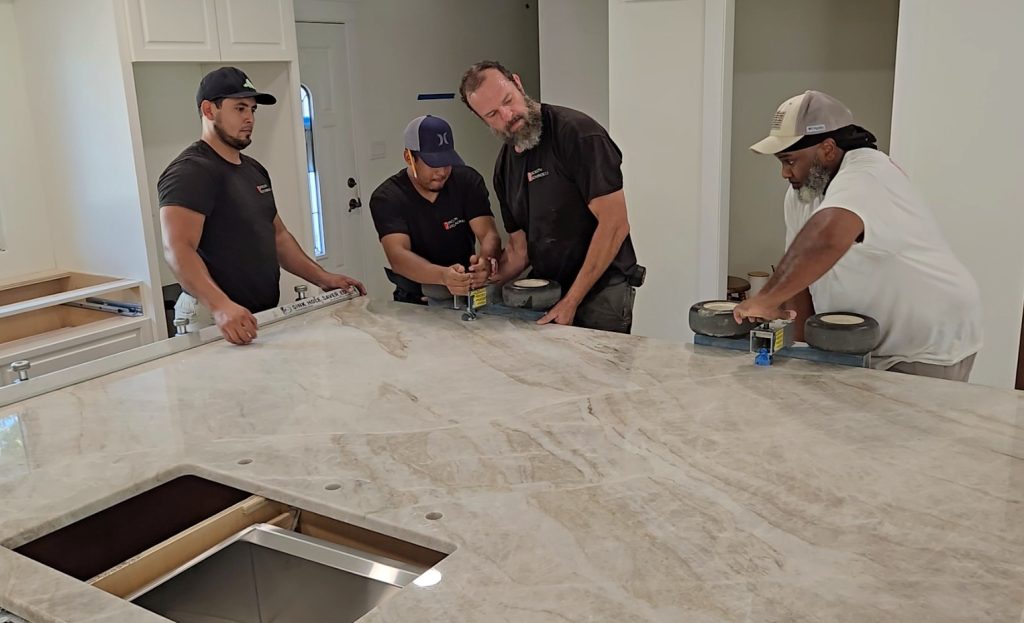
Finally, our installers bring your countertops to your home and set them in place. Specifically, they take their time, level every surface, and check that each seam lines up cleanly. We’ll install your sink during this visit, though we leave the plumbing connection to your plumber so the silicone can cure. Wait about 24 hours before the water gets hooked up. By the end of the day, your kitchen is transformed and ready to use.
Your Countertop Installation Process Timeline
Homeowners always want to know how long each phase takes and who does what. The table below breaks the countertop installation process into plain terms.
| Step | What Happens | Who Handles It |
|---|---|---|
| 1. Estimate | Free quote from your measurements or photos | You send info, we price it |
| 2. Stone Selection | Showroom visit or online browsing | You choose, we advise |
| 3. Templating | Laser measurement, CAD file for approval | Our template team |
| 4. Digital Layout | Preview of slab placement and seams | We build, you approve |
| 5. Fabrication | Robotic cutting, hand polishing, edge work | Our in-house shop |
| 6. Installation | Setting, leveling, sink fitting | Our install crew |
Timelines shift with material, slab availability, and project size. However, the sequence stays the same on every job, which is what keeps the experience predictable.
How to Prepare for Installation Day
A little prep on your end makes install day smooth. First, clear the counters completely and empty the cabinets directly below them. Second, move fragile items and furniture out of the path from your front door to the kitchen, since slabs are heavy and awkward to carry. Third, keep pets in a separate room while the crew works.
Have your sink and faucet decisions finalized before this point too. If you still need fixtures, our sinks and faucets selection can round out the project. Because the old countertops come off during this visit, expect your kitchen to be out of service for the day. Most homeowners are back to normal use within 24 hours.
Questions to Ask Before You Book a Fabricator
Not every countertop company runs the same way, so a few questions save you headaches later. Ask whether fabrication happens in-house or gets sent to a subcontractor, because in-house work keeps one team accountable. You should also ask how measurements are taken, since digital templating beats manual measuring for accuracy.
Additionally, ask to see a digital layout before cutting, and confirm who installs the sink and who handles the plumbing. Finally, ask how long the company has worked in your area. Two decades of local installs across Gainesville, Ocala, and Jacksonville tells you a company plans to stand behind its work.
Understanding the countertop installation process ahead of time turns a stressful remodel into a series of simple, expected steps.
Common Myths About the Countertop Installation Process
Myth: Templating and installation happen on the same day. Reality: These are separate visits. Templating captures measurements, and fabrication happens afterward, so installation comes days later once your stone is cut and polished.
Myth: You can use your new countertops the moment they’re installed. Reality: The surface itself is ready quickly, but the sink silicone needs about 24 hours to cure before a plumber connects the water.
Myth: All countertop shops fabricate their own stone. Reality: Many outsource the cutting to third parties. Jackson Stoneworks fabricates in-house, which is why quality control stays tight from start to finish.
Frequently Asked Questions About the Countertop Installation Process
How long does the countertop installation process take?
The full countertop installation process usually spans one to two weeks from template to install, depending on your material and slab availability. Templating, fabrication, and installation are separate stages. Actual installation day itself typically wraps up in a single day.
Do I need to be home during installation?
Yes, someone should be present to give the crew access and approve the final placement. The installers walk you through the finished work before they leave, so any questions get answered on the spot.
When can I use my sink after installation?
We set the sink on install day, but wait roughly 24 hours before your plumber connects the water. This gives the silicone time to cure and creates a watertight seal that lasts.
Ready to Start Your Countertop Installation Process?
When you understand how the countertop journey works, planning a remodel feels a lot less daunting. Choose Jackson Stoneworks if you want in-house fabrication, digital layouts you approve before cutting, and a crew that has installed stone across north-central Florida for more than twenty years.
Every step here exists to give you a surface that fits perfectly and looks right for years to come. If you’re ready to begin, request a free quote and our team will walk you through all six steps for your own kitchen.


